
Have you wondered how to go about fixing issues in your Canvas courses to improve the courses accessibility? Are you worried that it will be time consuming? Well, we have a few external tools integrated in Canvas that will help get you started on your path to having more accessible course content, a file cleanup tool called TidyUP and an accessibility tool called Ally. Though it can seem daunting at first, you will be surprised at how quickly you can improve a low score by targeting a few, easier-to-fix issues across courses.
Keep in mind that not all accessibility issues are quick and easy to fix, and it will be important to take a patient, measured approach to improving your accessibility performance over time. You will experience a higher level of success if you start with the following four common “fixes.” Once these initial improvements are complete, you can address more time-intensive content, like scanned PDFs.
Delete/Remove Old Files
We know removing old and unused files from your course can be a little scary at times, but nothing is easier when it comes to improving your overall course score than purging these old – and often inaccessible - files from your course. Any file in your Canvas course will be scored for accessibility, whether its published or not so to make it easier to locate files that may need to be removed we have a tool integrated into Canvas you can enable into your Canvas course’s navigation menu called TidyUP. This simple tool will scan your Canvas courses for unpublished content and unlinked files and then delete them from your course.
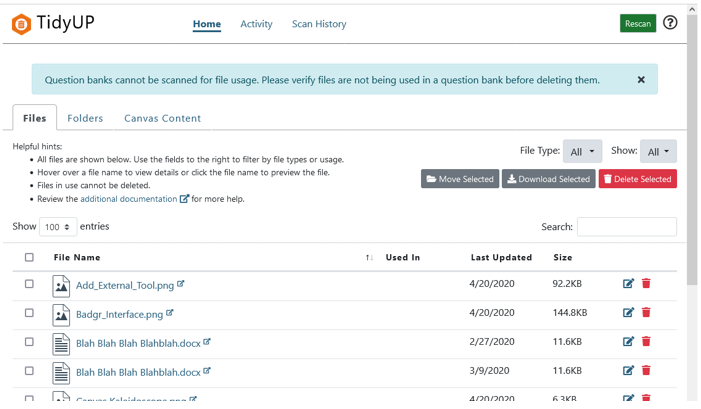
Image Missing a Description
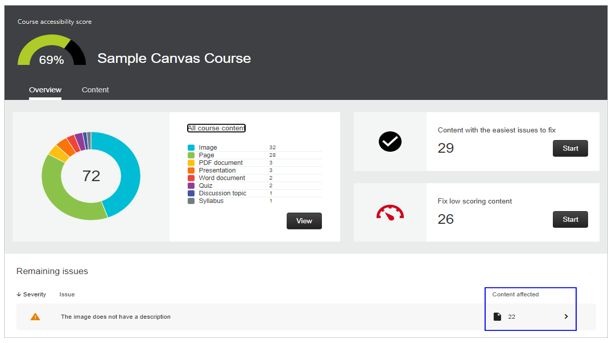
This may seem like an easy fix, and that’s because it is! But being an easy fix doesn’t make it any less important! Any student using assistive reading technology, such as a screen reader, relies on accurate and informative image descriptions to relay what a picture is showing. Missing Descriptions can occur for standalone images or within a document. The easiest way to add descriptions to the images in your course is to open your Ally Course Report, scan the list of accessibility issues, and locate content flagged with “The image does not have a description.”
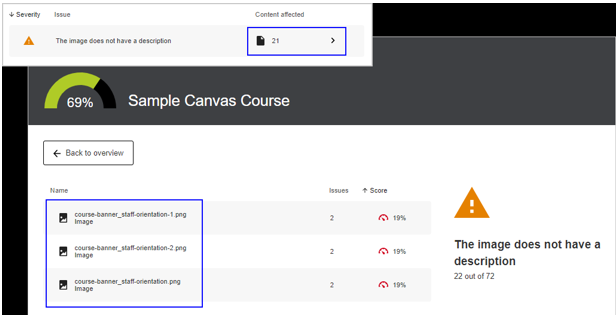
Once you click on the content affected, Ally provides a list of each image that needs attention.
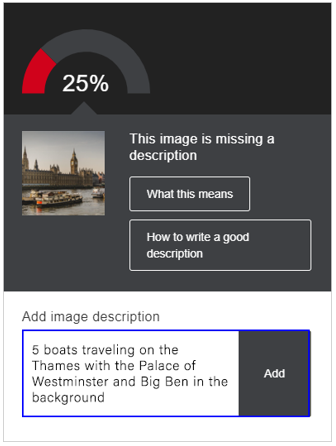
Click on a file, and Ally will walk you step-by-step through the process. Not only will Ally help you add an image description quickly and effortlessly, but it will also explain what this particular issue means for students and provide instructions for writing a good and meaningful description.
When you write an image description, avoid entering an image title or file name. Instead, give a brief description conveying the full meaning of the image. In this example, entering a title or file name for the image would fail to help students using assistive technology understand the content and context. Instead adding a more meaningful description would be “5 boats traveling on the Thames with the Palace of Westminster and Big Ben in the background.”
Documents Missing a Heading
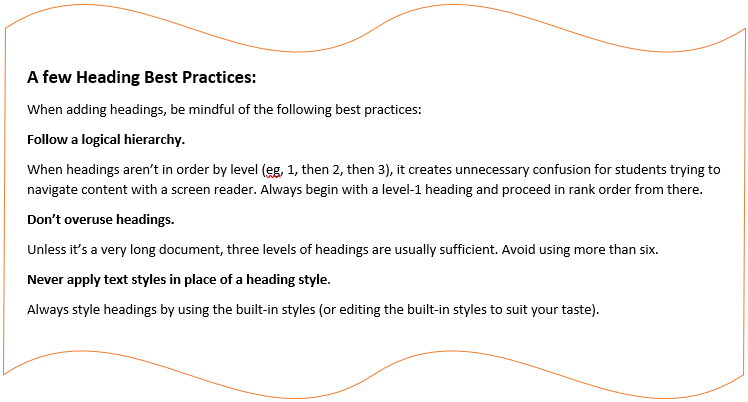
The proper use of heading styles is an easy way to improve the accessibility of course content. Headings help readers quickly scan sections of text and comprehend how content is organized. Students using assistive technology, like screen readers, depend on headings to navigate content. A common accessibility mistake is to style headings by adjusting the font size or applying boldface type, but screen readers don’t detect these variations as headings. For students with visual impairments, headings should always be applied using a program’s built-in heading styles.
You can find all the documents that are flagged by Ally as missing headings by opening your Ally Course Report, scan the list of accessibility issues, and locate content labeled “The document does not have any headings.”

Click on the content affected, and Ally will provide a list of individual files that need attention.

Identify the Microsoft Word documents that do not have headings. Though you’ll ultimately want to address other types of files like PowerPoint slides, Word documents are the easiest place to start. When you’re ready to take on others, Ally will help you through those, too.
To add headings to a Word document, follow the step-by-step instructions in the Ally instructor feedback panel:
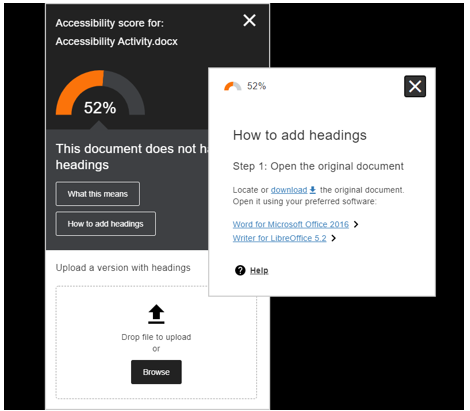
- Select How to add headings.
- Open your original document.
- Click on Word for Microsoft Office. Ally will provide instructions for adding heading styles in your file.
- Within your Word document, select the text you want to be your heading.
- Go to the Home tab and select the desired heading level from the Styles group.

Document is Missing a Title
Meaningful titles help students navigate documents with greater speed and ease. Most screen readers announce titles as soon as a new document is opened. When titles are missing or only a repeat of the filename, visually impaired students have no way to make a quick distinction between one document and another. Choosing which file to engage becomes cumbersome and time consuming. Adding a missing title is one of the easiest steps you can take to improve the accessibility of your course documents.
To identify documents in your course site that have been flagged by Ally as missing titles you will open your Ally Course Report, scan the list of accessibility issues, and locate content labeled “The document is missing a title.” Once you click on the content affected, Ally provides a list of files that need attention.
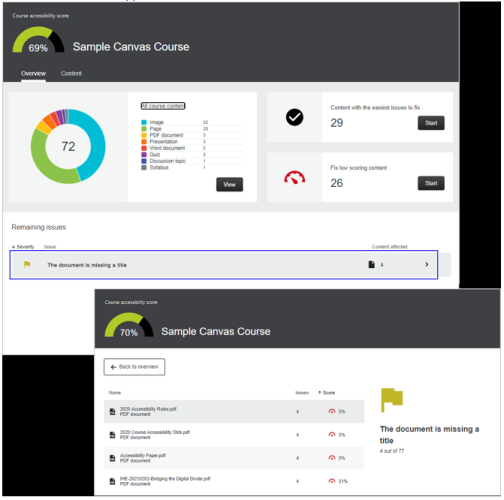
Click on a file, and Ally will walk you through the steps for adding a document title. If the document is a PDF, the best way to add a title is to locate the original document -- but you can typically add a title with Adobe Acrobat Pro if the original document is not available.
These tips will resolve the most common accessibility problems. Use the information provided by Ally to find and fix other issues.
For more information, or for one-on-one assistance, contact CCS.